
Discover how to create your own secure cryptocurrency hardware wallet using Raspberry Pi and the open-source PiTrezor project. This guide covers everything from selecting hardware to software setup and enhanced security features.
Introduction to Cryptocurrency Hardware Wallets
Cryptocurrency hardware wallets offer a secure way to store your digital assets offline, shielding them from online threats. For enthusiasts and tinkerers, the idea of building a homemade hardware wallet using Raspberry Pi presents an intriguing challenge. This article explores the PiTrezor project, a DIY approach that leverages the open-source software from Trezor and the accessible hardware of Raspberry Pi.
Why Choose a DIY Hardware Wallet?
- Customization and Learning: Creating a PiTrezor wallet allows for a deeper understanding of how hardware wallets function and can be tailored to specific needs.
- Cost-Effectiveness: For those with a Raspberry Pi at hand, this project can be more cost-efficient than purchasing a commercial wallet.
- Open-Source Trust: Utilizing open-source code means you’re not relying on proprietary software, offering transparency in how your data is handled.
Selecting Your Hardware
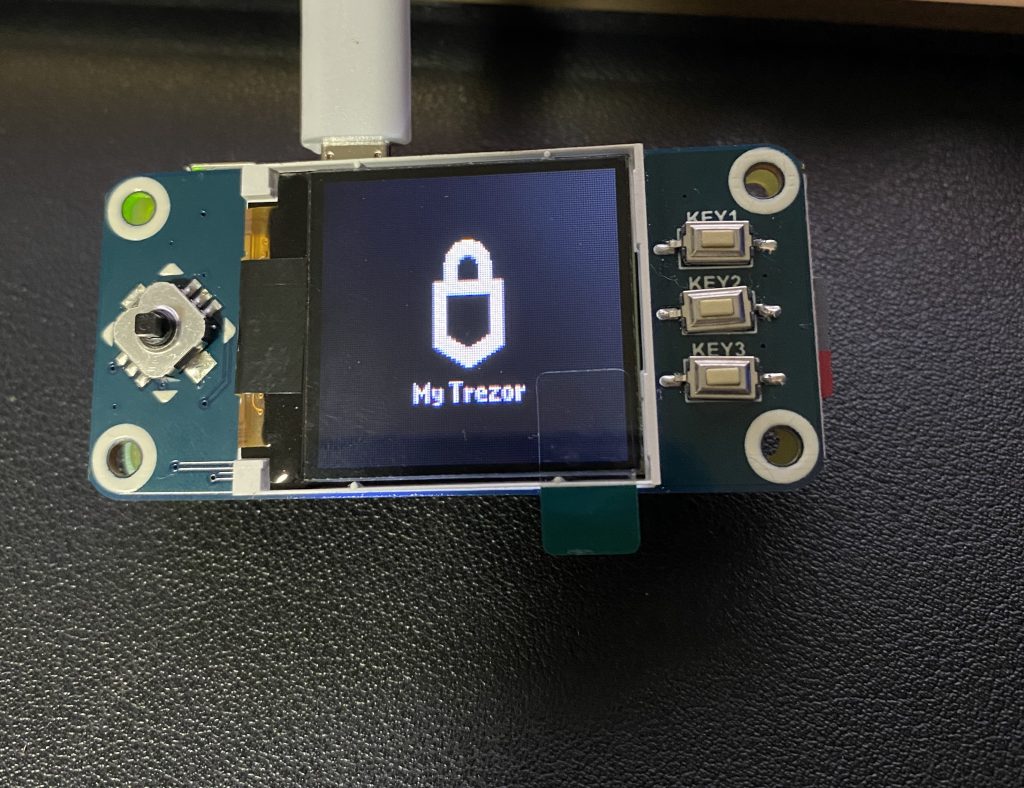
Choosing the right Raspberry Pi model and compatible peripherals is the first step. The Pi Zero W is recommended for its size, though WiFi and Bluetooth are not required for the wallet’s functionality. Compatible displays and connection options will also be discussed, ensuring your wallet has a user-friendly interface.
Software Setup and Configuration
- Downloading and Burning PiTrezor Code: Step-by-step instructions on how to download the official PiTrezor code and use Etcher software to burn it onto an SD card.
- Customizing Settings: How to configure the PiTrezor software to match your hardware setup, including display orientation and button configuration.
Connecting to Trezor Software
Once your PiTrezor is ready, connecting it to the official Trezor software is a critical step. This process ensures that your homemade wallet functions seamlessly with established cryptocurrency management tools.

Enhancing Your Wallet’s Security
- Understanding Mnemonic Passphrases: The importance of mnemonic passphrases in securing your wallet’s private key and how to generate them.
- Implementing a Passphrase for Extra Security: Adding a passphrase to your mnemonic phrase for an additional layer of security, making it nearly impossible for unauthorized users to access your assets without it.

The Future of DIY Cryptocurrency Wallets
Exploring what the future holds for DIY cryptocurrency wallets and how projects like PiTrezor contribute to the democratization of secure digital asset storage.
FAQs
- Q1:How does a hardware wallet provide more security than software wallets?
- A1:A hardware wallet provides more security than software wallets by storing private keys offline, making them immune to online hacking attempts.
- Q2:Can I use any model of Raspberry Pi for this project?
- A2:Yes, you can use any model of Raspberry Pi for a DIY hardware wallet project, but performance may vary.
- Q3:What happens if I lose my mnemonic passphrase?
- A3:If you lose your mnemonic passphrase, you cannot recover the funds in your wallet, as the passphrase is critical for accessing your cryptocurrency.
- Q4:Is it safe to connect my DIY wallet to public computers?
- A4:Connecting your DIY wallet to public computers is not recommended due to potential security risks from malware and keyloggers.
- Q5:How can I update the PiTrezor software in the future?
- A5:To update the PiTrezor software, you can download the latest version from the official GitHub repository and follow the provided update instructions.
Contact me if you have any questions.
Conclusion
Building a DIY cryptocurrency hardware wallet with Raspberry Pi and PiTrezor software is not only a rewarding project but also an excellent way to understand the inner workings of digital asset security. With the right tools, patience, and a bit of technical know-how, anyone can create a personalized, secure hardware wallet at home.